Note: You need to have owner or admin permission to accomplish the following steps
In Zenput, Projects are the most efficient way to keep track of progress for a group of tasks that must take place across many employees and locations. This comprehensive guide covers everything you need to know about creating, managing, and tracking projects in Zenput, including location-based and role-based assignments, different recurrence patterns, calendar event integration, and project lifecycle management.
Projects in Zenput allow you to efficiently manage and track tasks across multiple employees and locations. There are two primary project types:
Task Per Location
Assign tasks to specific locations. Users with the designated role at each location will receive the task. This is ideal for location-specific activities like opening/closing checklists, inventory counts, and facility inspections.
Task Per User via Roles
Assign tasks directly to users based on their roles, independent of location. Perfect for team-level tasks such as audits, training, maintenance, and cross-functional activities that aren't tied to specific locations.
Creating Projects
To create any project, start by navigating to Projects in the Zenput menu and selecting Create Project in the top right corner.
Note:In case you have Brand Manager – you will be able to select the Scope of the project (Brand or Company-wide):
Choose if you'd like this to be a role-based or location-based project.
Select the task type (choose between Form, Photo, or Basic Task) and provide a project title and instructions.
Choose which team should get assigned the tasks from this project, and which role as well.
Note: Please note that the "Allow users to complete tasks for others" is only available to users with the same role.
If you selected "Tasks per Location", define the location scope:
Assign to all locations within the team
Assign to specific locations by name
Assign based on location attributes (up to 5 attributes)
Choose the frequency, start date, and due date for the project.
Here, you can set it to be:
One-time (non-recurring)
This project will have only 1 occurrence, and is not editable after creation. You will see it under Projects, but not under Recurring.
Daily
For daily recurring tasks. To have a specific start and end time for these – select "Due" – "Between" – and choose the start and end times. If you would like a Form task to be assigned multiple times a day, create separate daily recurring projects with different time windows (for example: one due between 8am-11am, another between 12pm-3pm, and a final one between 5pm-10pm). Or use Calendar events for multiple tasks per day.
Weekly
Ideal for regular check-ins, weekly audits, and recurring operational tasks. You can select the weekday(-s) when the tasks will reoccur.
Monthly
You can choose the start day of the month or relative day (first Monday, last Friday, etc.). If the start day is in the future, you will have the option to start the project with an off-cycle task today in case you would like the project to begin immediately.
Yearly
All projects are set to automatically Auto-Archive by default (we suggest you always choose to auto-archive to prevent a culmination of overdue tasks, unless you would like the task to be able to be completed even past the due time.)
What happens when Auto-Archive is enabled
The project automatically moves to your archive folder once the due date has passed
Tasks are removed from users' task lists
You can still see the project and all related data in the archive section
Prevents accumulation of overdue tasks
What happens when Auto-Archive is disabled
Tasks remain open even after the due date has passed
Tasks can be completed past the due time
Uncompleted tasks will accumulate if left open
Under "Reporting" – select who will receive the daily snapshot email upon task completion. It will have a summary of the completed/missed tasks for this project.
If you choose not to auto-archive in the "Recurrence" step, the report will never be sent out until the project is manually archived.
On the right side, you'll see a Project Preview displaying the project name, type, assigned team, recurrence details, and targeted users/locations.
After that – click "Save" and you're all done!
Please note: You cannot start a recurring project on the same day. Projects can take up to 90 minutes to appear after creation.
Calendar events-based projects
If you'd like to use Calendar events, enable "Start and End Tasks by Event" under Recurrence.
Select either Multiple Tasks Per Day or One Task Per Day and select your Calendar Events. If needed, configure tasks to start Before, At, or After the selected Calendar event.
Important: If you are setting up a project to different locations and one of the locations closes after 12 AM (00:00), this location won't get tasks assigned. This is a technical limitation - time in our system is stored in time_offset_minutes (example: 5:00 AM is stored as 300 minutes).
Once a project is created, you can monitor its progress and completion status from the Projects page.
View all currently open projects in your company or team on the Projects page
Track progress by clicking on the Done or To Go buttons under the Progress section
Clicking To Go shows all users and locations where the task has yet to be completed - useful for identifying users who may need help
Clicking Done shows all users and locations where the task has been completed
Tip: Use the task report pages to export data, follow up with specific users, or analyze completion patterns over time.
Editing Recurring Projects
Please note:
Edits made to any project will only affect tasks generated after the next recurring instance. For example, if you do a daily project edit today, the next occurrence will be tomorrow, and after that occurrence the edits will be live, so it can be up to 48 hours. If you are editing a weekly, monthly, or another occurrence project aside from a daily project, it will take effect on the next occurrence.
ONLY recurring projects can be edited, one-time projects can NOT.
Hover on the right-hand side of the project to display three vertical dots – click Edit
Edit any of the non-greyed out fields:
Title of the project
Instructions
Locations assigned
Start date
Recurrence frequency
Day(s) of the week
Due date/time
End date
Auto-archive setting
Report recipients
Confirm changes in the preview window on the right side. Click Save.
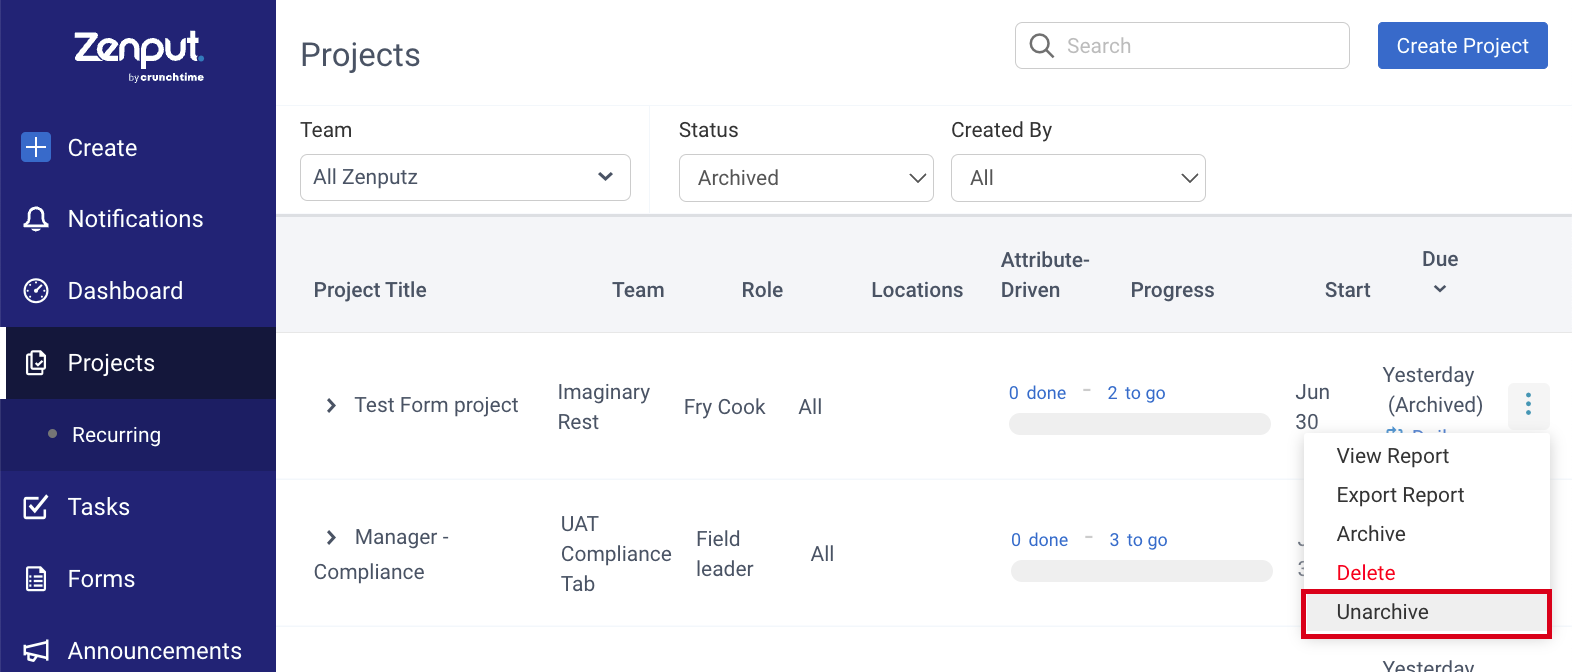
Archiving Projects
If you no longer need a project, you can archive it. For recurring projects, you need to archive both the parent project (from the Recurring view) and any active child projects (from the Projects view).
Please note:
If you ARCHIVE a project, it will continue to count towards completion rates and be included in reporting
If you DELETE a recurring project, it will NOT count towards completion rates nor will it be included in reporting
Comments
0 comments
Please sign in to leave a comment.